
Installation guide
Install your eSIMChina eSIM in under a minute
Scan a QR code with your phone's camera, tap a couple of buttons, and you're set. No new app, no SIM swap — your home line stays put and the eSIMChina eSIM sits beside it as a second cellular line.
Check before you buy
Does your phone support eSIM?
Find out in seconds with this universal code. Enter it in the Phone app just like you are about to make a call.
Verification code
*#06#It does not place a call or use credit. Your phone simply displays its device identifiers on screen.
Step 01
Enter *#06#
Open the Phone app and enter the code. Your device information normally appears as soon as you finish.
Step 02
Find "EID"
If you see a 32-digit EID, your phone includes the built-in chip needed to use an eSIM.
Step 03
Ready for eSIM
Just confirm that your phone is unlocked so it can use plans from other carriers.
An eSIM-ready phone
Every iPhone from XR (2018) onward, every recent Pixel and Galaxy flagship, and most modern OnePlus / Motorola devices.
Your QR email
We sent it the moment your payment cleared. Open it on a computer, tablet, or print — anything other than the phone you're installing on.
Wi-Fi handy
Installation needs Wi-Fi. Check the plan's Starts field first: first-connection plans can be installed early, while purchase-start and installation-start plans are already counting.
Walk me through it
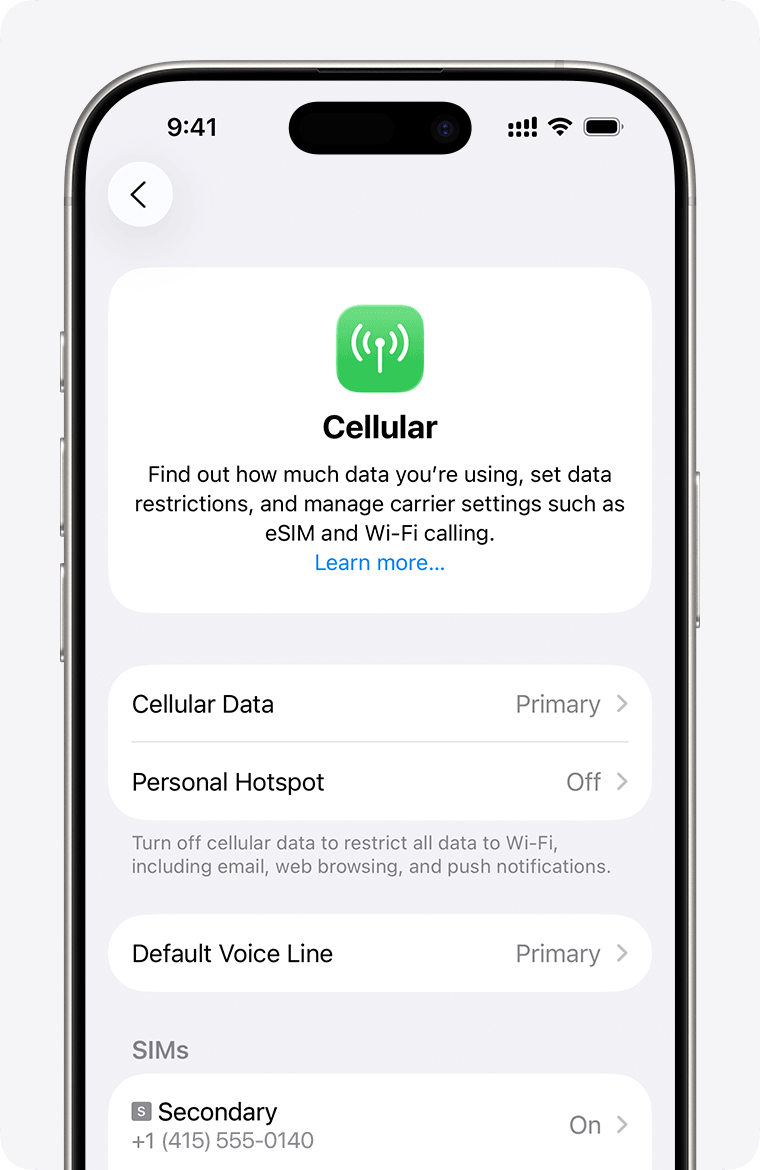
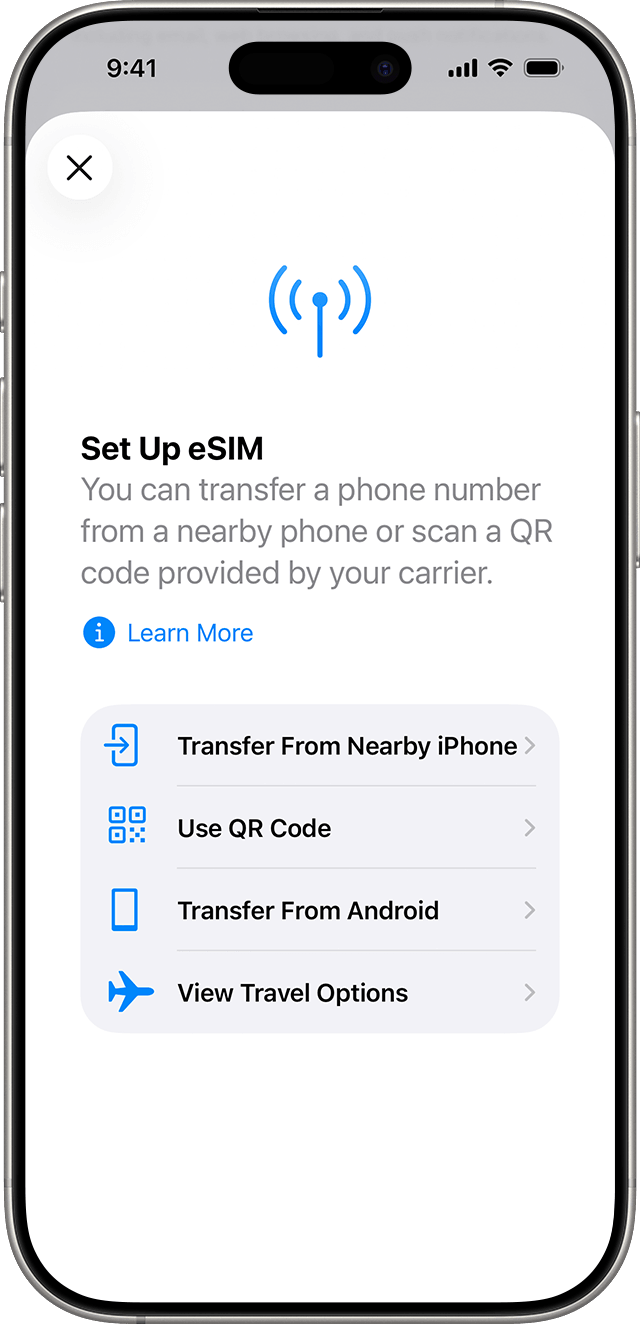
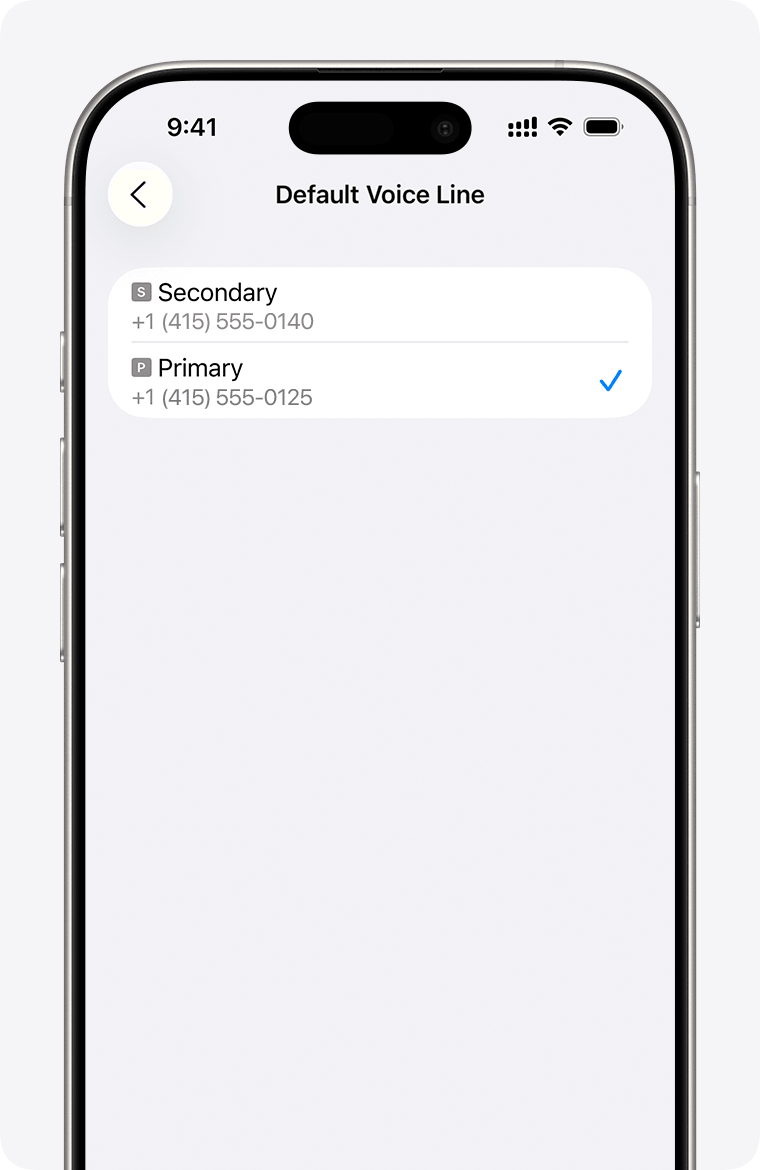
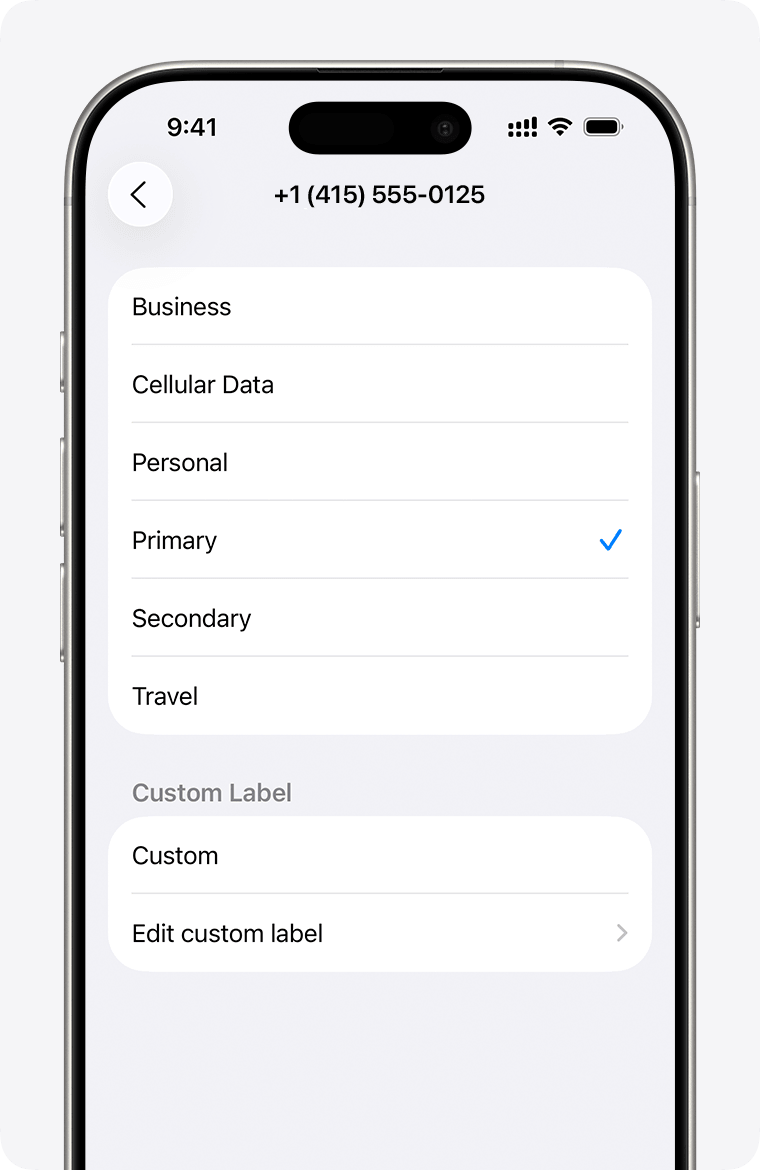
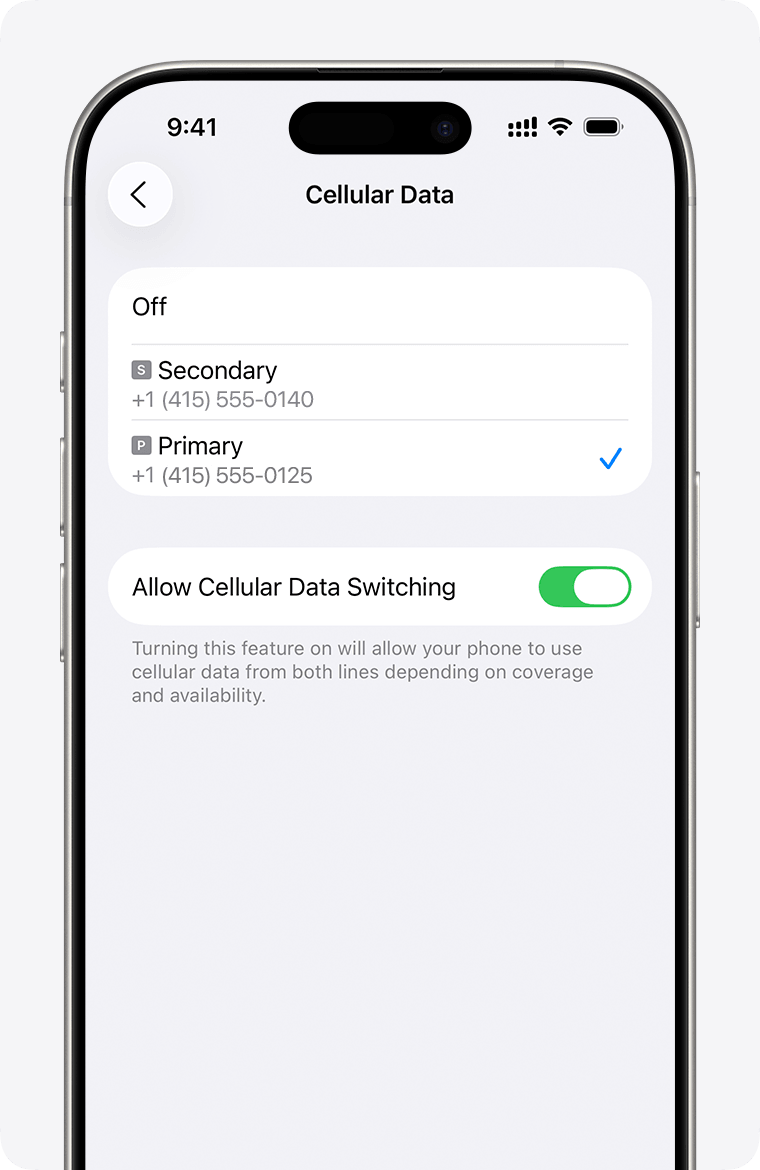
Open Settings, tap Cellular
On dual-SIM iPhones the section is called Cellular; some regions call it Mobile Service or Mobile Data — same place.
Two ways to install
Fastest path. Open the email on a second screen, point your phone's camera at it. Your phone offers to add the eSIM in one tap.
When the QR isn't reachable, every step below has an "enter manually" option. The activation string is in the same email under the QR image.
iPhone (iOS 16 and later)
Same flow for every iPhone from the XR onward. Make sure you're on Wi-Fi and have your QR email open on another screen.
Open Settings, tap Cellular
On dual-SIM iPhones the section is called Cellular; some regions call it Mobile Service or Mobile Data — same place.
Tap Add eSIM
Scroll past your existing SIM, find the Add eSIM (or Add Cellular Plan) row. You'll be offered to transfer from a nearby device — pick Use QR Code instead.
Scan the QR code from your email
Hold the phone over the QR image on your computer or tablet. The frame snaps green when it reads. If the camera can't see it, tap Enter Details Manually and copy the SM-DP+ address + activation code from the email.
Confirm the new plan
iOS shows the plan name (eSIMChina · Travel data) and asks you to continue. Tap Continue through the next two screens — the defaults are fine.
Label the line
Pick Travel (or any label you like) so you can tell the two lines apart in the dialer. This is purely cosmetic — nothing breaks if you skip it.
Set eSIMChina as your data line
On the next screen, choose your eSIMChina line for Cellular Data. Keep your primary line for calls and SMS so your home number still rings. That's it — you're installed.
Android (Samsung, Pixel, OnePlus, others)
Menu paths vary slightly by manufacturer. The labels below match Samsung One UI 6+ and Pixel — on Xiaomi / OnePlus look for SIM card manager or Mobile network under Connections.
Open Settings, tap Connections
On Pixel it's called Network & internet. Same place — the row that holds Wi-Fi, Bluetooth, and SIMs.
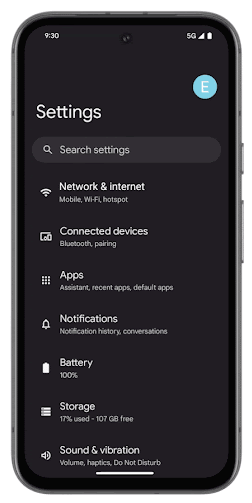
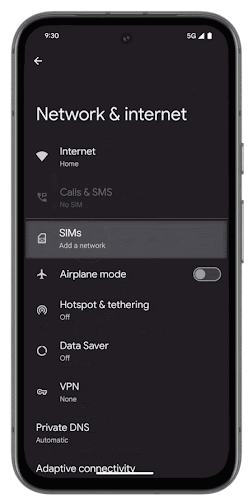
Open SIM manager
Samsung calls it SIM manager, Pixel calls it SIMs, others sometimes Mobile network. Whichever it's called, that's the screen where every line on the phone lives.
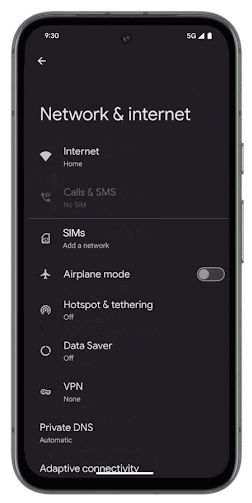
Tap Add eSIM
If your phone already has an eSIM slot occupied, you'll need to either reset it or move it to free a slot — most phones support several but a few are limited to one active eSIM at a time.
Scan the QR code
Same as on iPhone — point the camera at the QR image in your email. If scanning fails, tap Enter activation code manually and paste the string from the email.
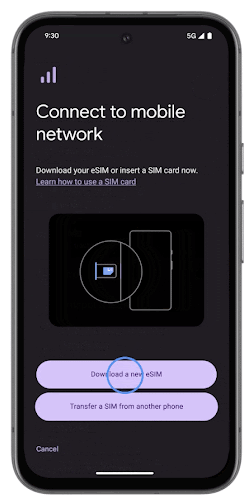
Switch mobile data to eSIMChina
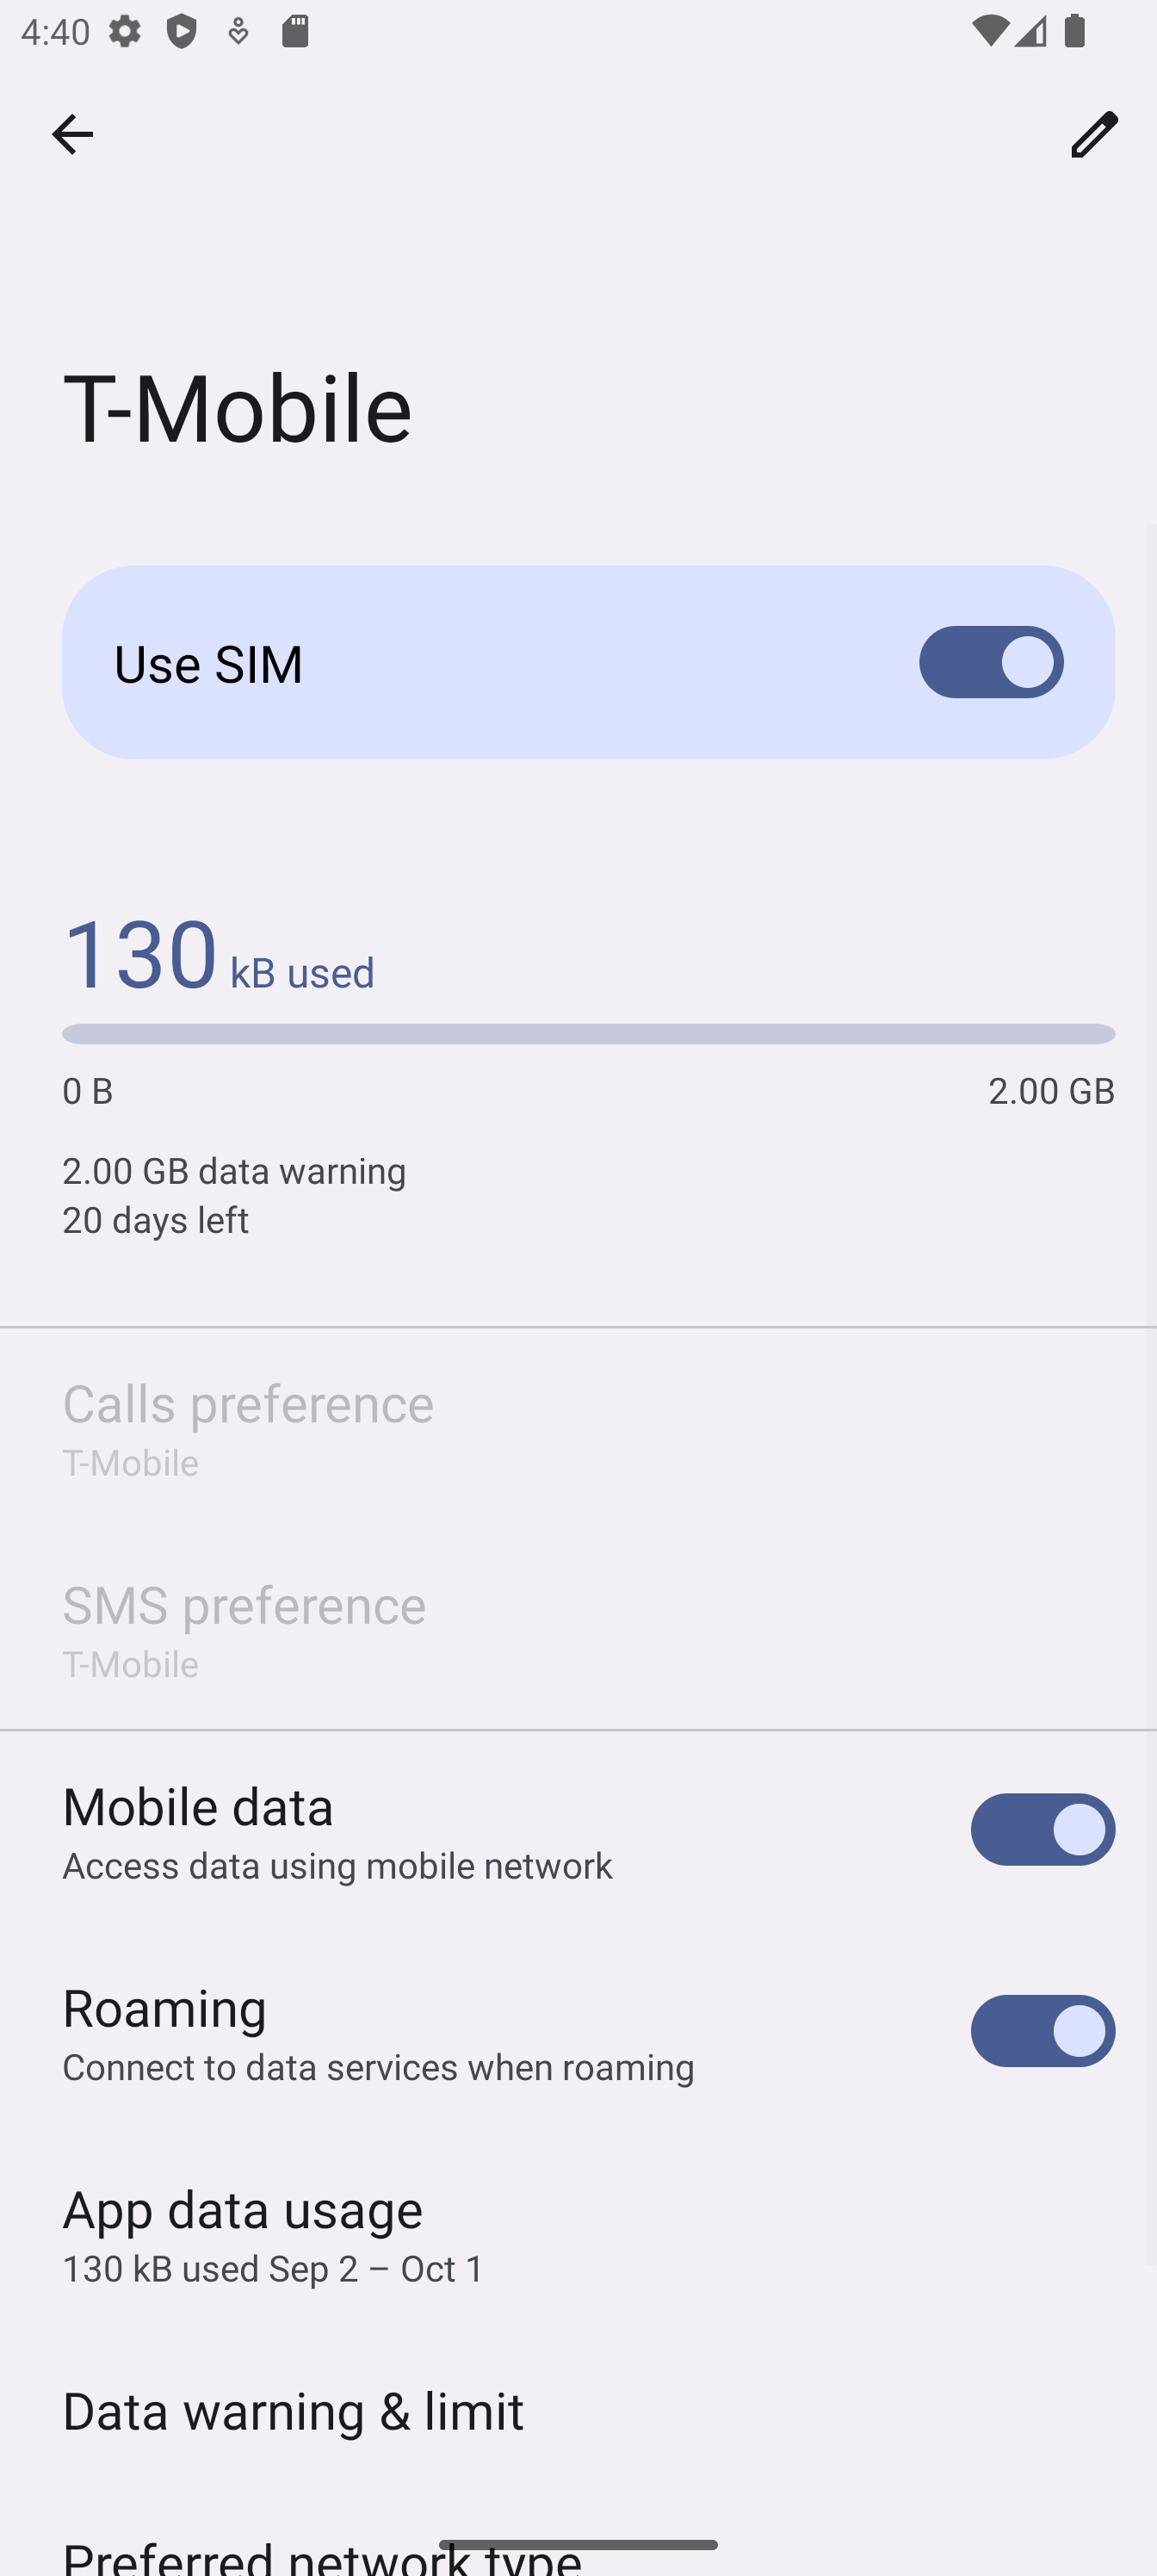
Once the eSIM is added, open Mobile data in SIM manager and pick the eSIMChina line. Leave calls and SMS pointing at your home SIM so your number keeps working.
Troubleshooting
I scanned the QR but my phone said "can't add eSIM"
Almost always a Wi-Fi issue — the install needs an internet connection to fetch the eSIM profile. Switch to a stable Wi-Fi network and try again. If you're already on Wi-Fi, restart the phone and re-scan; that resets the eSIM provisioning state.
The QR code won't scan from my screen
Increase your computer's brightness, make the QR larger in the email, and move your phone 15–20 cm away from the screen. If it still won't scan, every step has a manual path — open the email, copy the SM-DP+ address and activation code, and paste them in.
The eSIM installed but I have no service
Check three things, in order: (1) is data roaming ON for the eSIMChina line? (2) is Mobile Data set to the eSIMChina line? (3) are you inside the plan's coverage area? Also check the order's Starts field so you know whether its validity began at purchase, installation, or first connection. If those check out, toggle airplane mode for 30 seconds and let the phone re-attach.
I installed twice and now I have two eSIMs from eSIMChina
Open Cellular (iPhone) or SIM manager (Android) and remove the duplicate. Each eSIMChina eSIM has its own ICCID printed in the email — the older one is the duplicate. Removing the wrong one won't affect billing; just re-install the correct one from the same email.
I'm running out of high-speed data faster than expected
If you're on an unlimited day-pass plan, every day you get a fresh high-speed allotment that resets at midnight UTC — and the slower throttled speed after the cap is still usable for messaging, maps, and email. Heavy streaming and tethering eat through the daily cap fast; switching to a 2 GB/day or 3 GB/day plan typically fixes it.
Still stuck?
Reply to your order confirmation email or write to [email protected] with your order number. A human reads every inbound message and we typically reply within a couple of hours.